Saturday, November 24, 2012

It's getting that time of year

Hi everyone!
Its getting that time of year for parties and the big Jolly guy with a red sleigh to come around so I thought I would take a moment to give you a new recipe and a redux of an old one.. 

First the new one...  Pastry -Wrapped Brie with Raspberries
(Couple of comments - good luck finding the size Brie ring called for in this one - I couldn't - found one bigger and one smaller - I used the smaller one (8 oz) and it worked fine - just cut down the amount of raspberries and preserves a little)

Ingredients
1/2 cup Raspberry preserves
1/4 cup fresh or frozen unsweetened raspberries (thawed)
1/2 teaspoon finely chopped rosemary
1 sheet frozen puff pastry, thawed
1 13.2 oz Bay Brie cheese wheel
1 large egg (mixed with teaspoon of water for egg wash)
pinch (or a little more) of freshly ground black pepper

Baked Brie
Crackers/baguette slices and Grapes

Pre-heat oven to 400* combine preserves, raspberries and rosemary in small bowl, season with pepper.  Roll out pastry dough on lightly floured surface to 12 inch square.  Cut top rind off cheese (hint here, cut it off cold re-wrap and let come to room temp).  Place cheese rindless side up, in center of pastry.  Spoon raspberry mixture onto cheese.  Fold pastry on 2 opposite sides over cheese.  Brush remaining 2 sides of pastry with glaze and fold them over the previous sides.  Press seams to seal and brush pasty with glaze and place on backing sheet.

Bake cheese until pastry is deep golden brown (don't worry if it splits open it still tastes good) - should take about 30 minutes.  Let cool 20 minutes.  Place pastry in center of serving platter surround with baguettes, crackers and grapes. 

The next one is a redux of a recipe a couple years ago, but have a picture this time.
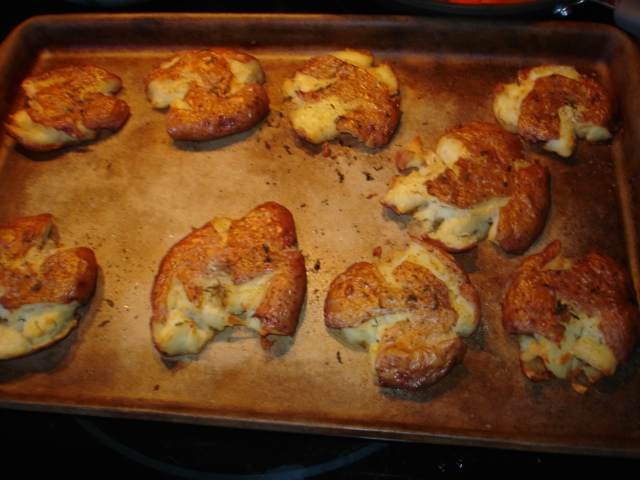
Sausage- Cheese Balls
Ingredients
1 lb lean HOT sausage
2 1/2 cups Bisquick
12 oz SHARP cheddar cheese, grated

Pre heat oven to 375*.  with your hands knead all the ingredients in a bowl.  I have a couple of recommendations for this...  1) If you grate the cheese yourself throw it in the freezer for 10-15 minutes or the heat of your hands will make it tough to grate 2) Mix the cheese and Bisquick together first - and put it in the microwave for 20 secs that helps get the cheese and Bisquick incorporated with the cheese - mixture shouldn't be too hot to mix the sausage in but the heat helps draw the moisture out of the cheese.  Then add the sausage and mix all three together to incorporate. (mixing may take a while -don't worry it will eventually get together.
Make into 1 inch balls and place on cookie sheet (leave plenty of room between them they will swell).  Bake for 15 minutes  This makes about 4 -5 dozen (depending on the size). 
Sausage Cheese Balls

I served them with a Sweet and Sour sauce as it works well with the heat of the sausage.   Not fancy food but very good for an informal party appetizer

As for the Jolly Man with the red sleigh... Here is the first sighting of the sleigh...  
Santa's Sleigh??????

Monday, November 5, 2012

South Dakota Trip Part 2

Back again;
Mark sent the pictures I was waiting for (thanks a bunch Mark) and I wanted to follow up on our last few day in SD.
I left off after the second day of walk in hunting with a cold and tired Ike. 
We finally got back to the hotel in Sioux Falls and got Ike fed and watered and still had to clean 3 of the pheasants we were able to bring down.  Well, I parked my truck under the lights and cleaned them on the tailgate.  In SD (as in many states) you have to leave the leg, head or wing on to identify them as a rooster - since you can't shoot the hens.  Got them cleaned and washed up and then brought out my vacuum sealer and got them sealed air tight and put in the fridge to chill. 

In lieu of a lot words, I am going to post pics with captions - that will be more fun to look at.  Just a couple of notes.  One a big thanks to Scott A and his Dad Bill for agreeing to come up on Saturday and hunt the day with us.  I know I sure enjoyed it and I think Bill and Scott did!!  Kudos to Scott for some GREAT shots too that day.  And Second, a note to Rosemary and Darryl our hosts, They took over for Judy and Ralph (Rosemary's parents) and the new house and lodge is ABSOLUTELY GREAT. The food was super and the hospitality top notch (Terry the homemade wine was really good this year).. Great time and Great people.
Well here are the pics... Enjoy:
Everybody ready to go

The new Lodge - It is really nice


BeBe the Wonder dog (and Steve D too!)

Ikey, with vest and boots under the watchful eye of Uncle Mike
Chuck and his son in law Zach It was Zach's first trip with us..


Most of our group with our former (now retired) hosts Ralph and Judy
Old Dead eye drops one
Lots of walking hope you have good boots

Our Saturday bounty... What a good time
BeBe sums it up... Man I'm bushed...


Sunday, November 4, 2012

New Recipe

Hi everyone -
Since I am waiting on some pictures to post the second installment of our South Dakota trip, I wanted to share with you the results of a new recipe I tried last night.  Since Ike and I harvest a number of birds we are always looking for ways to cook and eat them...  I got this recipe from a member of the Ultimate Pheasant Forum - http://www.ultimatepheasanthunting.com/recipes/ and this site has an entire listing of about 60 recipes for pheasant and wild game...    (Thanks to member BirdyBritt529 for the recipe..)
Here it is:
Maple Glazed Pheasant
Ingredients:

Legs and breast of 1 pheasant, skinned
1/2 cup flour
1/2 cup chopped parsley
2 cups maple syrup
1 cup butter
salt and pepper to taste (I also put in about a tsp of Paprika, and some dried Rosemary and Oregano in the flour mix)
Directions: Fillet meat off of the breast and thighs. Cut the meat into pieces of the same thickness. Season the flour in a bowl with salt and pepper and dredge the pheasant meat in the mixture. Dust pheasant pieces with onion powder. Melt 3/4 cup butter in skillet over medium heat. Brown the pheasant pieces and place in a lightly oiled 9×13 glass casserole. Sprinkle with parsley.

Add the syrup and 1/4 cup butter to the skillet. Mix well until butter is melted and then pour over the pheasant (should come about halfway up on the pheasant pieces). Seal the baking dish with aluminum foil and bake 30 minutes at 325 degrees. 

It was mighty tasty and looked very appealing.. 

After I took a couple pieces--- Oops busted

I made some minor changes - I boned out two whole breasts not the legs - that is what I had thawed out so that is what I used.  
With some loaded Mashed potatoes - use the sauce as a gravy


I think over risotto or wild rice would be a nice side as well.

Thursday, November 1, 2012

South Dakota 2012 Part 1

Hi everyone;
As you know this is the time of year that gets Ike's heart a pumpin'!!  Pheasant season in the Great Plains.  This year it was my desire to take Ike up and really work him out on some public hunting in Minnesota and South Dakota.  Lets just say that 5 straight days of hunting and two long 10+ hour days of travel were pretty hard on man and beast. 

We started in MN, and we met up with a couple on some public ground near Jackson and we joined forces and kicked up a couple hens and a rooster.  Ike was just getting his initial burst of energy out and was really working a little to fast to suit me.  Not unexpected since he hadn't really had much of an opportunity to do much local work all summer because of his cast.   We ended up hunting together until noon, getting a couple roosters and a Woodcock (timber doodle).  The couple and the lab Raven (Ray for short) were a true joy to hunt with and took the birds  - I said I have 4 more days to hunt so I should get plenty of opportunities.

We then went on to our farm in MN and met with the man that farms the property, Greg.  He is the nicest man and he said go ahead and hunt his property as well as ours (they butt up against each other) so Ike and I took off to see what we could see.  It had started off warm and foggy that morning but by now it had turned windy, and rainy and COLD!!  Ike and I worked a couple sloughs and ditches, kicking up 2 roosters and a hen,  - no shots at any - one rooster flushed wild and one was just too low over Ike to take a safe shot..  and of course the only good shot I had was at the hen - sorry can't shoot those  :(.  But we were both drenched and cold - Ike as soaked to the bone and Greg allowed us to go in his heated garage and towel off and warm Ike up.  We hung around a while and took off for SD. 


Ike warming up and resting after first cold day of hunting
Got to Sioux Falls a little later than planned (had a little wallet issue - Lesson #1 don't put all your money and credit cards in one spot - if you lose it you are screwed).  Greg found it (THANK YOU) and we were nothing but a little late.  Got to the hotel and checked in and saw the weather was not projected to be too good the next day.   It wasn't ....  We woke up to 3" of wet icy snow ans still had 187 miles to drive to meet with Ken and Steve to hunt walk in area near Presho SD.  Took off and got there just in time to start at Noon and as we pull into the hunting area we see two people already hunting.. They thought it was the week to start at 10 AM but they were wrong.  They were apologetic and left promptly.  We got started and hunted in pines, corn and sloughs and Ike was again a little over anxious - but he did do some good pointing - hens and roosters  Did a really nice job pointing in the slough but was walking through very cold water and after over 2 hours of solid hunting in the snow and wind, Ike was done - he doesn't have a lot of fat on his bones and he was cold and shivering.  I took him back to the truck and warmed him up - let him lay on the floor with the heater blowing right on him....  I have to tell you I was worried - I never saw him quit before.. 

Old farmhouse near Murdo SD - note Outhouse in back

We finished a couple more passes and got a couple of roosters but I decided to take off back to the hotel and get Ike some needed food water and warmth.   2 days of bad weather and tough hunting... I hope not an omen for the rest of the trip....... More to come in part 2

Tuesday, October 9, 2012

Homemade Pasta

Hi everyone -
As promised I will be more diligent in my postings going forward so here is my next one.

I love pasta - (yeah for those of you that know me maybe a little to much)  and while the standard dried pasta is very good and so many options available to us why would anyone go to the trouble of making their own.  Good question, right?  Well really the answer is it isn't that "hard" to do, and really not that messy either (that is a relative term :) ). 
First of all the basic ingredients:
Flour, Salt, Egg, Olive Oil and Water - That's it.  Now you can add semolina flour, whole wheat flour, spinach, basil or any other herb to flavor and color the pasta but those 5 ingredients are the basics. 
To make 1 pound of fresh pasta here are the proportions of the above ingredients:
Flour    9 oz (I have a scale and always go by weight not volume)
Salt      1/2 teaspoon
Large Egg (1)
Olive Oil  1 oz
Water       2 oz

I use plain old AP (all purpose) flour but have in the past used the "00" fine flour as it makes a smoother pasta but it works fine for me.  Now my hint to reduce the mess.. Instead of mixing this on the counter or table find a BIG Tupperware bowl - you know the kind the one you put the Halloween candy in or Popcorn for the "Godfather" trilogy showing on your TV.  Make a mound of flour in the bowl and make a little well in it.  Mix together the salt eggs and oil and water and then pour them into the well you made in the mound of flour.  Using a fork slowly stir the flour incorporating it into the liquid.  After most of the flour is incorporated bring the dough together into a ball.  Knead it together (adding flour or a few drops of water depending on it's consistency) until it becomes smooth and elastic but no longer wet.  Now cover with plastic wrap and let rest for at least 30 minutes. 

Use this time to prep your noodle making.  If you have a pasta machine the hard work will be lifting that darn mixer out of the cupboard, but if not you will need to flour an area get your rolling pin out and roll prepare to roll out your pasta sheets.  This is the way my mom and grandma used to make their egg noodles.  Now that was a little more work than what I am going to describe  (I have a Kitchen Aid pasta kit)

After your pasta has rested, take the ball and split it into 4 pieces.  Take one piece and set the other 3 back in your bowl and cover again with the plastic - you don't want them drying out.

Rune the pasta through the roller tool starting at the widest setting and folding the pasta back on itself and rotating the sheet 90* each time you do that.  To explain after you roll your pasta it will look like a long sheet. Lay the sheet so the length is perpendicular to you.  Fold each end (about 1/3 of the length) back on itself and press it down.  Then back your pasta roller off one number and drop it through again with the folded ends on each side.  That way you are stretching the gluten all directions and makes for a smoother and more supple piece of pasta.

Repeat until you get to the preferred thickness.  That depends on your use.  Lasagna noodles thicker - Angel Hair thinner -  Linguine somewhere in between - hey remember it's your pasta make it as think as you like....
After you get all your sheets completed change to your cutter and run them through the cutter  or if you want really wide noodles, Flout the sheets Roll them up and cut by hand with a sharp knife.  (That is the way Grandma used to do it - I swear she used a freakin' sword it was so big -or at least it did to me when I was 6-7 years old).  Lay out the noodles to dry or if you have one use a drying rack. 
When cooking don't over cook - it doesn't take NEARLY as much time to cook fresh past as dried so  when it floats up it usually is done (4-5 minutes). 

Anyway these are the basics - experiment on your own but don't be afraid to make your own pasta..

Maybe I'll make some pheasant ravioli next.... "Oh Ikey, Hunting season is getting close...  Hey Ike, Wake up...... let's go find that bird"

Monday, October 1, 2012

It's been a long time.

Hi Everyone;
I was reminded today of the lack of posts on my part lately and for that I apologize.  Just lots of things going on but no excuses.
I have couple of very good recipes to share today - Another Short Rib recipe.... From a restrauant near Hartford CT  (CW's Chop and Catch) and another one that Sandy got from the Web. Another one for cooked carrots that is a real keeper.

First the Short Ribs - (and this ain't fast food -but think Crock Pot...hmmmmm)

Short ribs
Ingredients:
4 10 oz Boneless Short Ribs
Salt and Pepper to taste
5 Stalks of Celery, sliced
1/2 White Onion diced
2 carrots peeled and sliced
1 Quart Dr. Pepper (the Secret Ingredient)
1 Quart Chicken Stock
1 Sprig Thyme
1 Tbsp Liquid Smoke
1 Tbsp Cumin
1Tbsp Paprika
2 Cups Red Wine

Season ribs with salt and pepper - heat oil in large skillet and sear ribs on all sides (perhaps a splatter shield would be a good investment -  I know I used mine!).  Remove to roasting pan and lower heat.

Brown Celery, onion and carrots on low heat.  Deglaze pan with Red wine.

Combine remaining ingredients in the skillet bring to a boil and then pour over the short ribs in the roasting pan.  Cover tightly with foil and cook at 350* for 2 -3 hours - or until ribs are fork tender.  Strain the sauce through a fine mesh strainer and reduce to a syrup type consistency.  This step takes a while - There is a lot of liquid but it is realy worth it trust me...

These can be served over cheesy polenta, mashed potatoes, risotto, or even the potatoes below....

Now the easy one - Crash Hot Potatoes
Ingrediemts:
12 whole new red potaotes
3 tablespoons Olive oil
Kosher Salt to Taste
Black Pepper to taste
Rosemary or other favorite herb
(we also grated some Parmesean cheese over them as well)

Bring a pot of heavily salted water to a boil and add as many potatoes as you wish to make and cook them until they are fork tender.
Crash Hot Potatoes
On a sheet pan (we used a Pampered Chef Bar Stone) generously drizzle olive oil  and place potatoes on the sheet pan with plenty of room between. With a potato masher, gently press down on the potato until is slightly mashes then turn the masher 90* and mash again.  Brush the tops of the potatoes with more olive oil and sprinkle with salt pepper and your favorite herb.
Bake at 450* for 20 - 25 minutes until golden brown (when the come out that is when we grated parmesean cheese on them too... 

Recipe #3 Apple and Honey Glazed Carrots
Another real simple recipe with very few ingredients.
Small bag of baby carrots
2 Tbsp of butter
3/4 cup of Apple juice (or cider if season is right)
1/4 cup Orange juice
2 Tbsp Honey

Apple Honey Glazed Carrots
Melt butter in sauce pan.  Place carrots in pan add salt and pepper and saute until brown and softened. (it will take a while- but resisit the temtation to crank the heat - keep it at medium/medium high heat and stir it often).  This will take about 15 minutes min - one suggestion was to cook the carrots the day before and then add finish them the day of the party. Not a bad idea
Once carrots are brown, add remaining ingredients and cook until sauces starts to thicken and take on more carmel hue.  Remove from pan and that's it... Really simple....... really good.
The whole meal
So I tried to make up for lost time on this post.. I promise I will be more attentive in the future  -  oh by the way, only a few more day until hunting season...  Ike can smell it - he looks great and while he has a little ear infection - we have that under control and chomping at the bit to get out there and, "Find that bird!"


Thursday, July 19, 2012

Ike's recovery

As you know Ike has had an injury - first noticed in January and after 3+months of not getting any better I took him to my Vet.  Below is a diary of the process from beginning to end... Sorry for the length but for those of you that have a pet, you know the lengths you will go to to help him out


4/21/12
My GSP, Ike, has seemed to be favoring his left back foot on and off since the end of January/beginning of February. Just while at rest - standing around or eating. He would just hold it up but when playing or running (or hunting) he was fine and showed no ill signs. I thought that it was just a sore pad or maybe a pulled muscle and he would get better. Well he hasn't -tried a couple days of Rimydal I had left over from my SD trip last October but wasn't comfortable doing that for any length of time without a vet seeing him. So I had some days off and got him into the vet and they took some Xrays and bewteen my normal vet and the Orthopedic surgeon she referred me to, it has been decided that he has a partially torn Achilles Tendon. Treatment no surgery, but casting for the next 3-5 weeks after a cortisone shot to reduce the inflamation. Here is a pic of him getting along well with the splint we are to use until he can get cast Monday.

Ike in his first splint
4/30/12

In fact they said the swelling was down enough from the splint they didn't even give him a cortisone shot - seemed to not be necessary in the eyes of the Vet. He had developed an abrasion at the very top of his first cast and I re-padded it and treated it with some EMT gel. It has scabbed over an appears to be healing nicely - the Vets put the seocnd cast a little lower and added additional soft cast materials to the very top.
My biggest issue is he seems to be feeling much better and in turn his activity level is racheting up there. First week or so he seemed to sleep more and more sedate (no sedatives I just think he was healing). I hope the next couple weeks go as well.
I asked the vet about the painkiller - They said we could give it to him- but they didn't seem to think he showed symptoms of pain while they observed him (they kept him for the whole day after each casting to make sure all went well).

5/5/12

Ike got his third cast Thursday morning this week. No X-rays yet but Vet says right on plan for healing and looks very good. He does think tho that he may want to go to one more cast - but will Xray after this one is removed to make final decision. I have to say the Clinic(s) both my primary one and the referal one seem to really be doing a fine job. I believe that is one of the reasons we are looking at one additional cast - just to keep him under control for a longer period of time.

5/13/12

FYI everyone - I have been misunderstanding the Surgeon, thinking each week they are replacing the cast with a new (albeit slightly) adjusted one. But no, each week for the past 4 has only been a "re-wrap" of the same cast and it will be at least 10 more days before he gets his 2nd cast. Man I feel like an idiot, I was thinking, "geeze, this isn't so bad." But it turns out it will most likely be all of June before he is cast or splint free. That's the bad news - the good news is the Dr. says everything is heal up just fine and actually is ahead of where he thought he would be. I just want to make sure he heals up and I figure out how to balance his high energy play with not wanting it to happen again. More to come when I know it.

Ike with the walking cast - man does that tear up floors
5/22/12

Latest update- Ike is presently exceeding recovery plans. The Surgeon thinks that we may be ready to skip the last cast and go to a splint in a couple weeks. His swelling is almost down to nothing and upon physical inpection the Vet says about 2 weeks ahead of his schedule. I sure hope so - as he is really wanting to get back to his old self. On the other good side, he hasn't had a seizure in 8 weeks.... longest span (usually 6 weeks) sine they started on Labor Day last year. Have stopped all treats except solid Chicken Breast slices and milk bones to help clean his teeth and staying on Purina Pro Plan high performancefor daily food.

5/30/12

Ike is now in his splint - Vet has bee very supportive and yesterday said he was amazed at how well the achilles has healed. Swelling is completely down and will leave him in the splint with significantly more "bend" in his hock thus putting more pressure on the tendon than there has been in the casts for a week or two. Hope all continues as it has and in a week or two I will post a pic of Ike cast and splint free. Man I have to tell you he is getting darn bored with leash only walks... and that "cone of shame" he has to wear.

back into a splint
6/10/12

Update on Ike;
Went to the vet this week, hoping we would get the "all clear" no more splint result, but no joy here. While the swelling and injury looks very good, (Vet said swelling is completely gone) he says he still observes Ike holding his leg up not putting equal pressure on it and favoring it some. He said 2 more weeks in a splint (with even more natural bend to the hock/achilles tendon area) then if all goes well no more splint and one month of continued limited activity and if all looks good then he will release him. Just not sure why but seems to be favoring it more again... Holding it up when he eats, hopping on 3 legs when I walk him. I don't know I am a little disheartened and just feel he went backwards. Guess I'll just observe and make sure to limit his activities and then take him back. I don't know I may splurge for an MRI on the leg as an X-ray won't really be conclusive on soft tissue...I'll ask and see what Vet says. He seems to have been pretty straight forward with me to date.

6/18/12

Latest on Ike: Last Thursday I noticed a little sore developing under his splint and because I was going to be out of town for a couple of days and it was forecast to be hot and humid through the weekend, I decided to see if I could take him to the vet and get the splint and the sore taken care of. Well the Vet removed the splint, treated the sore (he said it was good idea to come in as getting it treated early will be key to keeping it from getting really nasty). He also decided the leg was looking so good he took the hard splint completely off, and gave just a protective soft wrap with almost total flexibility to the hock and tendon. He said that he may be a little tender on it for a couple days, as his tendon hasn't been this "natural" for 8-9 weeks. Well, Ike must be ready to go as he really has shown no signs of holding it up or favoring the left leg at all. I will keep it this way for another week and hopefully get it off completely. The other good news is that the vet didn't even charge me for this visit... I gotta tell ya, I am very pleased with the clinic as a whole...

6/21/12

Well today we got the soft wrap off and Ike is au natural. Gaskin muscle looks a little atrophied, and sure was glad to give him a bath as his skin got a little funky under the vaious wraps. But all in all, he is doing fine and we are all glad his recovery has been as good as it has been.
As stated above very happy with the Vet - we are on a month long limited activity protocol, then if all still ok, start him on a conditioning program to get him ready for Hunting season. Weighed the little guy (thought he might have gained a few pounds during this period of reduced activity) but he only gained 6/10ths of a pound... Heck, I gained more than that
Think we are on a good path.

7/3/12

Well it has been two week without any protection still under restricted activity and things seem to be going along fine. No swelling whatsoever and he sure doesn't seem to be in any pain at all. I am still concerned Ike hold up the foot on occasion. Seems like he does it out of habit. Muscle atrophy was more than I thought when you compare the two legs but another couple weeks and we'll go back to the vet. WIth the heat it is just as good we are keeping him inside... While no fires here (man those people in CO and NM have my sympathies) the heat and lack of rain are getting scary. Only time we get rain the storms and accompanying micorbursts have caused tremendous damage. There were still at last count 144K of people without power last night in various suburbs... Sorry I digress Anyway, While Ike is doing better I don't know if he will ever be 100% -

7/18/12

Final update for all interested parties... Yesterday Ike visited the Vet and was given a final release. Vet spent quite a bit of time (in 100* weather no less) watching him walk, "cantor" and stop and turn and said that as non-invasive procedure results go he couldn't be happier. Says ok to go off leash and while he wouldn't advise any activities requiring sharp cuts or twists (no more KONG in the back yard) he says start him out slow and if we see him favoring it back it down a notch and start increasing activity more slowly. The last couple weeks he sure seemed like his old self.  He had been off the leg for quite a while and it just took him a little time to get back into the swing. Still don't know how he did it so just going to start over and cross my fingers we don't do something stupid..
All things considered I couldn't be happier with the Vet, the Vet Techs and the clinic as a whole. The last 3 visits they didn't even charge me..... Total bill just a little shy of $800 (lots cheaper than the surgery) and my VPI ins will most likely pick up 70-75% of that bill.
I will give the group a strong thumbs up for both medical skill and bedside manner.
We'll be in SD last week of Oct, God willin'
Here's a little something I saw... Kind of small but click on it an it will enlarge enough to read it.
A little thing to think about

Friday, June 22, 2012

The Scalloping Gourmet

Hi everyone - Been a while sorry...  As the last post indicated, Sandy was out of town on business, and while Ike tried to sneak along with her he was unsuccessful so he and I were batching  for the week.  Ike was still in his cast and splint, (next update on his status) so we weren't able to venture too far so we did our fair share of cooking...    I posted most of them before, black and blue steak,  pork chops, salmon and jambalaya  but the one I want to focus on in this blog is the scallops and garlic spaghetti.  We had recently gone to Trader Joe's (of the famous 2 buck chuck wine) and they had a special on IFF (Individually Flash Frozen) scallops.  So we brought 'em home and since Sandy isn't a scallop fan per se, I thought the time was right for me to do them again.  
Ingredients:
6 sea scallops - fresh is great if you have them but if frozen defrost following directions.
3 Tbsp Old Bay seasoning
6-8 Cherry or Grape tomatoes - washed and sliced in half
8-10 fresh Basil leaves - more or less depending upon how big or how much you like Sweet Basil
2 cloves of Garlic either sliced verrrrry thin or chopped
3 Tbsp of Olive Oil
6 oz of Spaghetti  cooked al dente

OK start by getting some heavily salted water on the boil for the spaghetti.
Cook spaghetti to al dente, remove from water and rinse (This should be done before scallops are cooking as they don't take too long)
While water is boiling, slice/chop garlic, wash/slice tomatoes and chop or tear basil leaves
While spaghetti is cooking, warm Olive Oil in skillet
Rinse and pat dry the scallops and sprinkle the Old Bay Seasoning on both sides.
When oil is hot, place scallops in skillet.  They don't take long and you don't want to over cook so as soon as they start to brown nicely on one side turn and add tomatoes and then garlic - reduce heat.  saute the mixture and then place drained spaghetti in skillet and mix to warm and coat with olive oil.  Toss in basil leaves and then serve in bowl or plate.  Nice Chardonnay goes very well with this dish.
Scallops Ala Ike

Saturday, June 2, 2012

Ike the Stowaway

Ike has been the subject of many topics on this blog - but this one kind of takes the cake.
We were packing a suitcase for Sandy's recent business trip and she said she needed another pair of shoes.  So we went into the closet to pick them out and get them down off the shelf, and while we were in there - all of about 30 seconds - Ike decided he wanted to accompany his mom along on her trip.  
We turned around, and here is what we were treated to:
"What??? I'm not doin' nuthin'"


"If I get into a small enough ball they won't notice"
Well, I couldn't get the lid closed and I don't think he would make it though the TSA screening so we had to remove our not so little stowaway.  We laughed and we couldn't really get mad at him.  He has been such a trooper with his torn Achilles Tendon (which is going quite well according to the Vet).   Ike is getting better and better and when we are completely done I will let eveyone know - that is if I don't come home to a letter telling me he has decided to travel around the world.

Sunday, May 20, 2012

Happy Birthday to Ike


Well, today is Ike's 3rd birthday!! Happy birthday buddy. No party this year as you are the only one in the house that seems to be feeling pretty normal. Sandy has been sick for over a week and myself, since Wednesday. We'll celebrate maybe at the Memorial Day Holiday but I wouldn't know what to do if you weren't in our lives.. Enjoys some pics over the past 2 1/2 years

We're figuring out who is the boss (we agreed she was taking the picture)

CEO of Ike Inc.

Ike's first South Dakota Bird

Stretch!

Working In South Dakota

I am one tired pup!


Spoiled, me?????

Monday, April 30, 2012

Short Ribs

Hello everyone - No change in the Ikester - Except that I think he is feeling much better as he is much more active and has rediscovered his hatred for squirrels...Golly - even with only 3 good legs I think he would chase them until he caught 'em.

This weekend the weather was just not very conducive to outside work - We seem to have had our late April weather in early March here so we decided to hunker down and restock our supply of chili and red sauce.  I already have provided the recipe for both of them so I will focus on the Sunday project of Braised Short Ribs.  First a little background...
Sandy and I had gone to a local Italian chain establishment known for the salad and bread sticks and while there I saw on the menu braised short ribs with Risotto.  They sounded very good and were so I asked our waiter if they had the recipe for them.  He said they sometimes post the recipes on their main website and we would have to look to see it this was one of the posted ones.  Well it was so here goes.

3 lbs boneless beef short ribs
2 cups Chianti Wine
1 Medium Onion chopped
4 cloves Garlic minced
1 28-30 oz can of crushed tomatoes *
3 cups beef stock
1 teaspoon chopped Rosemary
3/4 cup slice Porcini or other mushrooms**
1/4 cup Olive Oil
salt and pepper to taste

* I personally would not add crushed tomatoes - I would add one additional cup of beef stock and 1/2 cup additional wine and then at the very end add about 6-8 cherry tomatoes
** Mushrooms were not in the original recipe, but I thought the matched up very nicely with the earthy and hearty short ribs - omit if you would like.

First salt and pepper the short ribs.  Heat large skillet (with lid) and add olive oil.  Place short ribs in hot oil and be careful not to crowd - do them in batches if your skillet isn't big enough.  Brown all ribs on all sides and remove to bowl or plate until later.
short ribs
Add onions to oil and saute for a couple minutes, then add garlic - careful not to let it burn, then add wine, and beef stock separately allowing for some of the liquid to cook down before adding the next (wait about 5 minutes between additions of liquids) this de-glazed the pan nicely and really gets the sauce started out right.  Add the chopped rosemary and mushrooms.  (Now if you were to add the tomatoes, they would go in with the rest of the liquids, it is up to you - as that is what the recipe calls for but my sauce was not as smooth and was a little too "tomatoey" for me).
Place the short ribs (as well as all the juice that collected in the bowl back into the skillet and turn to low and cover for 3 hours.  I know, I know I didn't say this was fast food but trust me you will be rewarded.
After 3 hours of braising, remove the ribs to a serving vessel and cover, bringing the remaining liquid to a boil uncovered and reduce about 1/3 (about 10-15 minutes).  (if I used cherry tomatoes instead of crushed - I would add them here)
Serve with Risotto, Polenta or even mashed potatoes and a few freshly steam green beans or asparagus....  You will NOT be disappointed!

Back to Cooking - Lasgna

Hello everyone, and while Ike is recovering nicely I wanted to get back to some cooking on the blog. Last Sunday we were talking about what to have for dinner and the subject of Lasagna came up.  Now, Sandy and I have different ideas about Lasagna - hers very traditional and mine notsomuch..... 
We has always had to either compromise, where neither of us were perfectly happy or dirty two different pans, and try to fit them into the oven.  Well, we found the solution - A three tray lasagna pan. That pan allows for each "tunnel" to be constructed independently of any other.  The ingredients can be completely different as well as the sauces. 


Sandy's was very traditional Lasagna noodles cooked al dente and a combo of ricotta, Parmesan, and Mozzarella combined with and egg and some spices for the cheese filling.  We used a traditional red sauce and topped with shredded moz and grated Parmesan.  It was very good.

For mine, I first made a Bechamel sauce.  3 tablespoons Butter, 3 tablespoons flour and cooked it into a roux.  Then added about 2 cups of warm Milk (I would have like to used a blend of whole milk and half an half but didn't have any) and then 4 oz of Shredded Havarti, and 2 oz of shredded mozzarella and 2 oz  of shredded Asiago.  When that was incorporated and smoothly melted in I added some freshly grated nutmeg (maybe an 1/8 of a teaspoon).  Removed from heat and began to prepare the noodles and sauce. 
The sauce consisted of my traditional red sauce but I added some Hot Italian Sausage to it and then cooked the sauce down to tighten it up a little.  By that time the noodles were ready and assembly began.

I had sliced up some fresh green pepper and baby portabella mushrooms and proceeded to layer 2 of the three tunnels alternating sauce, noodle vegetables and Bachamel until they were full.  I left a layer of bechamel and grated parm on the top and cooked covered for 25 minutes at 375* and then reduced the temp to 325* and finished uncovered for 15 minutes.  I was very happy to see that excess moisture of the vegetables were absorbed by the al dente noodles and I think some of the bechamel sauce as the end product was firm and not watery.  We completed the meal with a salad and garlic bread and a very nice Merlot. 
We finished up with a very good "Ice Wine" from Canada - very sweet and almost syrup-like. It was a very nice way to end the meal.

Saturday, April 28, 2012

Ike The Patient Update

Well Ike has had a pretty eventful last few days.  He has graduated from the splint it the last post to his first hard cast and even to his second a little sooner than what we had planned.  Here is my running diary of our events:

Monday 4/23/12
Took Ike to VCA Aurora Animal Hospital this morning to drop him off  to get the splint removed and get a cortisone shot and then get the first of 3 permanent casts applied.  On Friday they didn’t tell me not to feed him any breakfast in case they had to anesthetize him but the good news was I got a call about 11 am that said he was a very good boy needed no anesthesia and the swelling in his hock was done sufficiently so no cortisone was administered.  I was told to keep him from chewing the cast, no outside activity other than on a leash for a bio break and look for any swelling in the toes of the casted leg.  Come back in 5-7 days to get the cast replaced with the second of the three planned steps.   Set up appointment for Monday the 30th

Thursday 4/26/12

Ike seemed to be doing fine – I had to do some damage control on the top of his cast – I swear he can go from doing nothing to total destruction in 5 minutes.  Wednesday I had to do a quick fix and Thursday he had developed a small little sore at the top of the cast – probably from where he had removed the extra padding so I put some EMT gel on it and added additional padding with some surgical gauze (all this is contained in my First Aid Kit) and then re-wrapped it with some self-adhesive first aid wrap. I called the vet back and inquired if I could come in on Friday instead of Monday to get the cast replaced – since they had said 5-7 days anyway. They said sure so I made the appointment for Friday morning again. I tried our “Blow up pet collar” as the traditional “Cone of Shame” was difficult for us to use with our kennel, and Ike kept running into things and just hated it.  We have the blow up collar from when he was neutered but he really never bothered that incision so we didn’t have to use it.  Let’s just say that I got it on him and thought I had successfully gotten him acclimated to it and asleep.  Boy, was I wrong!  I didn’t leave him 5 minutes to go back to my home office to get on another conference call and I hear him thumping his way on the hardwood floors my way.  He comes around the corner and hanging from his neck is the remnants of his blow up collar – the inch wide nylon strap is chewed completely through and he had successfully gotten a hold of the outside cover and chewed two holes in that.  All in 5 Minutes.!!  So the Big Cone of Shame came back out.

Friday 4/27/12
Got up early and took Ike to the VCA hospital by 7:45.  Ike got taken right in and again needed no anesthesia for anything (they say he is such a well behaved boy) so I took some feed with us and they him for me and kept him under observation until I picked him up later that afternoon.  They suggested some other collars and we were able to find (on clearance) a comfy collar model that seemed to provide the protection with less problems.  They lowered the hard cast area and added extra padding on the top of the cast and said the sore was very small and would be fine.  Just need to keep him from licking and chewing on the cast.  Progress is very good and I hope we can get more time with the vet the next drop off to see where we go next

Saturday, April 21, 2012

Ike the patient

My buddy Ike has been favoring his back left leg for quite a while - and I was just hoping it would get better by itself. But I had some time off this week and Sandy and I decided it was not getting any better and make an appointment to see the Vet. Well it turned out that it appears he has a partial tear of his Achilles tendon on his left foot (hock).
We were referred to a specialist and while we don't like to hear the bad news it isn't as bad as it could be. The good news is no surgery!! The bad news is a series of splints and casts for the next 4-6 weeks. Well keep everyone posted - but check out the pic below... The Vets at the VCA Aurora Animal Hospital even chose blaze orange for his outside wrap - in honor of his hunting... and while it took a little while for him to get used to it - he motors around pretty well. I don't know how we'll keep his energy channeled as there is no playing or unsupervised time outside so that may mean even more walks for he and I.

Sunday, April 15, 2012

Crazy Coupon

Hi everyone -
Another quick note - Wanted to do a follow up to a subject that I touched on in an earlier post. My wife is a very effective couponer - not totally over the edge but really pretty effective on getting value out of the deals offered. I was asked by one of our neighbors the other night (while Sandy actually was AT a coupon class) if we really save money with coupons? I said yes we do, and we really have enough toilet paper and paper towels for a while - it's not like they expire or go bad so why not, right? So anyway I wanted to put together a post for a meal or appetizer who's main components were all purchased with coupons.
Here is one I did today with ingredients and approximate cost
Crab Louie Salad:
Crab pieces (6 oz each package buy one get one free coupon for one free so total cost $0)
3 Tablespoons green onions, chopped (whole bunch $1 approx cost 20 cents)
2 stalks celery, diced small (again whole head $1 approx cost 20 cents)
3 radishes cut into matchsticks (again whole bag $1 approx cost 15 cents)
4 oz Fresh Mozzarella "pebbles" (2 (8 oz each) for one at Jewel -approx cost of amount 50 cents
2 tablespoons Lemon Juice (lemons 3/$1) cost 15 cents
Tablespoon Capers with Juice (had those in fridge - cost today $0 but OK say 50 cents)
2 Tablespoons Ketchup (OK who doesn't have ketchup in their fridge????? - heck check your glove compartment of your car :))
Tablespoon of Cocktail sauce
Mix together and serve on crackers, Melba toast or even better in a Bibb lettuce boat...
Total cost about $3 for an appetizer that would feed 10-12 guests...
Take a look - doesn't look bad does it...(I made a sandwich for lunch no stinkin' Melba toast for me)

Pheasant Poppers

Just a quick post here. A couple of posts back I posted some pheasant breasts wrapped in pepper bacon and grilled... So my mind started working I was watching a cooking show about appetizers and one was a jalapeno popper and that started me thinking.... So bear with me on this one, as the recipe is a little "loose" in it's construction but I'll think you'll get the idea.
2 whole pheasant breasts (boned out)
4 oz cream cheese
1 tsp of paprika (sweet or smoked either one)
1/2 tsp of Chili powder
1/4 tsp granulated garlic
few drops hot sauce
small can of water chestnuts (sorry only need 6-8 slices of them total - depending on the number of pieces of breast meat you get)
either pepperocinis or jalapeno pepper slices (same thing one per piece of breast meat
1 cup bottled Balsamic vinegar dressing
4-6 slices of bacon
6-8 toothpicks
First bone out the breasts and pound each fillet to a about 1/4 " thin.
Mix next 5 ingredients together until well blended.
Place Tablespoon (more or less depending on size of breast) of cream cheese mixture near one of the short ends of the pounded breast)
Place one slice each of the water chestnut and pepper on the cream cheese and roll.
Secure with one toothpick.
Take bacon slice and wrap the pheasant roulette in a covering of bacon, and secure with another toothpick.
Marinate refrigerated in dressing for 20 mints to hour.
Place on hot grill - watching for flare ups due to oil. Cook until bacon is cooked and cream cheese starts to run out.
Serve with favorite dipping sauce.
Ike, thanks for getting me these birds.. Couldn't do it without you buddy.

Monday, April 9, 2012

Terrific Turkey and Groovy Gravy

Hi everyone;
I hope everyone had a safe and joyous Easter. Let's not forget the reason for the holiday, and for the kids may they still be on the sugar high from chocolate bunnies and jelly bean Easter Eggs.

For me it was cooking for the family dinner. Turkey, mashed potatoes, stuffing and gravy.
Today I just want to tell you about the turkey and the gravy.... For the first time I brined my turkey. I followed the recipe for the brining by Alton Brown -more or less I added some additional items but I have to say that if you haven't brined a turkey before, it really does add an amazing amount of moisture as well as some subtle flavor.

Here is the link.. http://www.foodnetwork.com/recipes/alton-brown/good-eats-roast-turkey-recipe/index.html

I added an orange and lemon studded with cloves and used a 5 gallon cooler (like the kind that get dumped on coaches after they win the Superbowl) for about 20 hours. I was quite impressed with the level of juiciness and flavor it imparted. I also instead of using canola oil, I made a compound butter of rosemary, sage and Italian parsley and liberally massaged it in under the skin as well as on the top of it and it made a beautiful golden brown and crispy skin. It really was a "Terrific Turkey".

Now for the "Groovy Gravy" and I wanted to tell you about that. I have never had much luck with flour gravies, preferring cornstarch over flour, but traditional turkey gravy calls for flour so that is what I tried to use.
I started with about 4 cups of drippings from the turkey - de-fatted using a fat separator cup. it was very clear and flavorful looking liquid so I has a very good base from which to start.
I then took 1/3 cup each flour and unsalted butter, melted the butter and added the flour and stirred until a golden brown. (I was making a roux). I wanted to make sure I cooked the flour enough (always my problem I think) to remove the pasty, gummy taste. BUT you have to be very careful not to burn it a roux can go from golden brown to brick to BLACK in a very few minutes so pay attention :) One it got to the color I liked I added the 4 cups of drippings and stirred with a wooden spoon until the starch particles burst and turned the liquid into the best looking gravy I had ever made. Added a little salt and pepper to taste and removed from heat.

A hint for serving (or at least transporting to where your dinner is being served, if you have a good thermos, charge it with hot water for about 10 minutes pour out the water and then fill with your gravy. Mine stayed steaming hot for over 2 hours that way......

It really did turn out to be a great meal... Everyone participated and no one went hungry.
Happy Easter everyone!

Tuesday, March 20, 2012

A little good PR

I know 2 posts in one day.... but wanted to share a pretty good interview I had in the local paper here in Aurora, the Beacon News. It has to do with a running theme about men who cook, and since they already had a on about BBQ and Smoking Sandy said I should drop the reporter an email and tell her about my blog... and my recipes.
Well I did and here is the article I included a link and a jpeg of it I scanned in. I hope you enjoy it.

Spring has sprung!

Hi everyone;
Happy Spring - and boy has it sprung all over the place - I still have gas in my snowblower (used exactly once this year) and now need to mow my lawn. The farm had 5 calves today - always a busy time but the good news was the guys didn't have to walk through knee deep mud to get them up and nursing on momma.... Belated Happy Birthday to my mom, who turned a not so spry 85 on Friday --- Bad news was she celebrated it in the hospital, but good news - she was out at a rehabilitation center by Monday. You just can't keep a good German woman down ;) .
Anyway on to the good recipe. Sandy had torn a chicken breast recipe out of Good Housekeeping and I have to admit it looked pretty good so I thought I would try it out tonight, so here goes:
1 pound carrots thinly sliced at an angle
2 tsp Extra Virgin Olive Oil
1 Cup Panko Bread Crumbs
1 1/4 lbs Skinless, boneless thin sliced chicken breast cutlets (about 4)
1 Tbsp Dijion Mustard
1/2 cup plus 1 Tbsp balsamic vinegar
5 oz baby Arugula
1/2 cup Fresh basil torn
1) Preheat oven to 450* and on Jelly Roll pan toss carrots with EVOO and 1/8 tsp each salt and pepper. Roast 8-10 mins until crisp-tender and transfer to large bowl to cool.
2) While carrots cook, place panko on large plate and in medium bowl toss chicken with 1/4 tsp black pepper and mustard until well coated.
3) Transfer chicken to panko and press to coat well. let rest 5 minutes. Place chicken on rack over same jelly roll pan and cook 12 -14 minutes or until registers 165* on thermometer
4) While chicken cooks in 1 quart sauce pan, heat 1/2 cup balsamic vinegar and 1/8 tsp salt and pepper to a boil and then reduce heat simmer 8 to 12 minutes until syrupy.
5) To same bowl as carrots add arugula, basil and remaining Tbsp balsamic vinegar. Toss and serve with Chicken and balsamic glaze.
It sounds like it would take a long time but if you look you can stack almost all the time so this can go from 0 to dinner in 30 minutes... You tell me 370 calories per serving with 33 g of protein.... Looks pretty good to me. It was absolutely perfect match with a Yellow Tail Chardonnay